
The food we consume is a complex mixture of 3 major macromolecules; carbohydrates, lipids, and proteins. All these together provide a surplus source of nutrition and energy for running the body’s metabolism. The human body is designed in such a way that it requires a proportionate diet where each of these molecules is assigned a specific role. These different types of macromolecules are chemically diverse and have unique compositions.
One of these molecules is “carbohydrate”. The fad of the low-carb diet is currently well-known. But the consumption of carbohydrates should not be reduced below a certain level as they are the most important energy-giving food. Well, the “choice of carbohydrates” is something that can be better played with. On one hand, whole wheat bread, quinoa, oats, and fruits can be consumed as good sources of carbohydrates, while burgers, fried potato wedges, and french fries might not be a healthy choice.
With everyone aware of carbohydrates in our food, the need for biochemical tests at industrial and research levels is necessitated. Such a test is the “Iodine Test”. It tests for the presence of the helix structure of amylase where the iodine molecule gets fixed. Though it’s a very simple type of test to look out for the presence of carbohydrates, many students struggle to comprehend the science behind it. Students introduced to this test often find it difficult to learn its details, underlying principle, and its real-world applications. Even educators dealing with the topic sometimes fail to deliver the essence of this topic and its crux.
We, at Labster, understand the complexities of this biochemical test. This article can provide some help as it attempts to identify the major issues encountered by students while studying this topic. It also lists practical solutions that teachers and educators can incorporate into their next class. By the end, we’ll convince you why a virtual lab simulation will be helpful not only for your students but also for you as an educator to deliver concepts more efficiently.
There are 3 reasons why students dread and get confused about the topic of the Iodine Test. Acknowledging these blocks is the first step toward making the topic more approachable.
This is one of the main reasons why most students don’t understand the working of the Iodine test and other biochemical tests performed for food macromolecules. When the underlying principle is not clear, the test becomes less logical and more theoretical to students. The ‘why’ (reason for performing the test) and ‘how’ (the underlying principle of the test) of each test performed for different macromolecules must be thorough to young learners.
Directly teaching about the Iodine test in your next class might not be recommended. Many students don’t know the basic difference between “carbohydrates and sugars”, “basic structure of starch”, “the difference between amylose and amylopectin”, “basic chemistry behind charge-transfer complexes”, “nature of molecular iodine”, “different types of polyiodide ions (I3- , I5- , or I7-), etc. Basic knowledge about carbohydrates, their structure, bonds involved, etc is a prerequisite before one moves on to complex topics like biochemical testing, reagents used for tests, etc.
Learning a biochemical test seems worthless to students when they don’t know how to use it in their future research, industry jobs, or businesses. The Iodine test is often taught to students without educating them about its practical utility. This makes the learning journey dull and non-conducive.
To address the issues encountered while teaching this topic, educators can engage the under-listed solutions in their classes. These can decode many different aspects of the Iodine Test. Not only can they make teaching easier for educators like you but they will also make lessons clearer and easier to assimilate for your students.
This is our foremost advice to all educators dealing with the Iodine test. Designing biochemical tests that exploit the basic biochemistry of carbohydrates at the molecular level necessitates the need for strong core concepts. You can begin with the underlisted examples in your next class.
Different types of food macromolecules (You can use the Introduction to Food Macromolecules simulation from Labster)
Basis of differentiating different food macromolecules
Introduction to carbohydrates
Difference between carbohydrates and sugars
Simple versus complex carbohydrates
Different types of carbohydrates (monosaccharides, disaccharides, oligosaccharides, and polysaccharides)
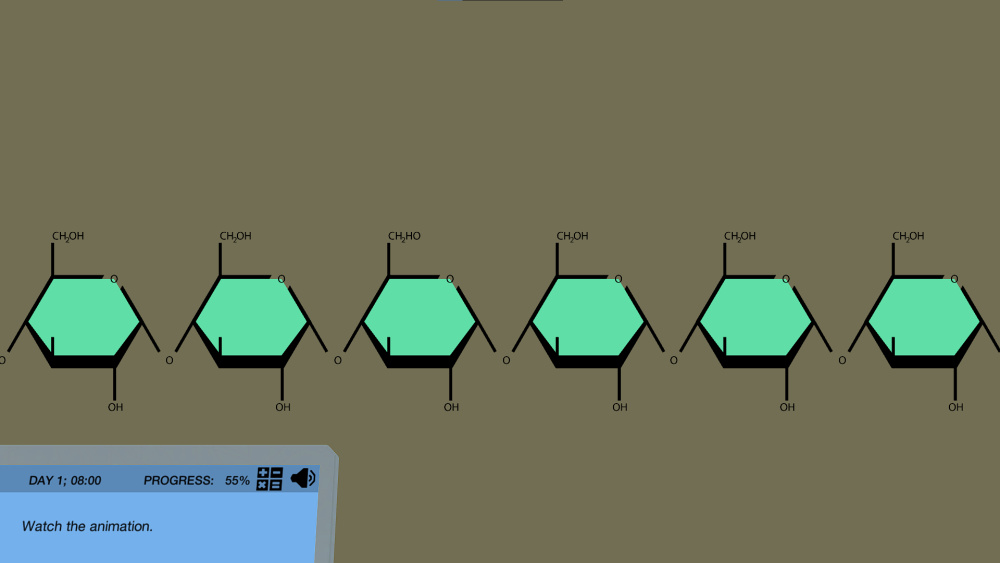
Commonly known carbohydrates and their structures (Starch, cellulose, glycogen)
Similarities and differences between starch, cellulose, and glycogen
Different components of starch (amylose and amylopectin)
Catering to these topics before explaining the Iodine test can ease your work. Additionally, it will encourage students to raise questions in a more open-ended manner during classroom teaching sessions related to “basic science”.
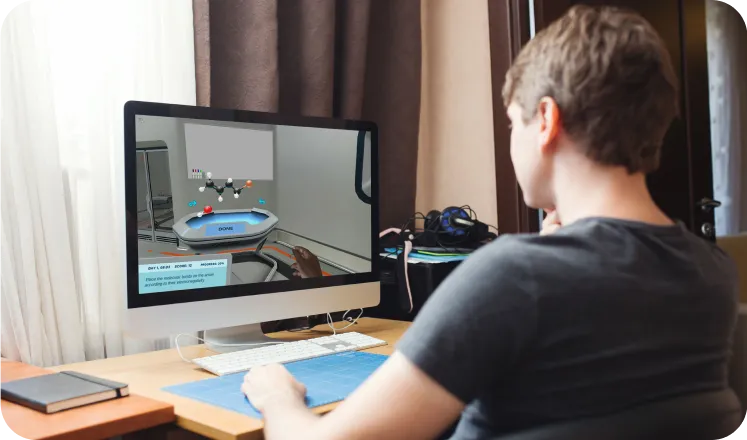
Figure: A snippet from the Iodine Test simulation by Labster. It is available for High School classes.
The Iodine test is one of the many biochemical tests used in both academic research and the R&Ds of industries. Teaching your students how to approach a problem scientifically can help them reason out where “Iodine test can be applied” and “where it shouldn't be”. You can quote the under-listed example to showcase why scientifically approaching a problem can save both time and effort.
Example: The iodine test works for complex carbohydrates like starch. Starch is composed of 2 components called amylose and amylopectin. The iodine molecule goes and binds inside the “helix structure of the amylose”.
So, if one tests food rich in starch (some veggies like potato, peas, corn, yam, and fruits like raw/unripe banana, and food grains like wheat) using the Iodine test, we can expect a bluish-black color due to the successful binding of iodine inside the amylose helix structure.
However, if one tests food rich in sugar (most fruits, ripe bananas) using the Iodine test, we won’t get a bluish-black color. This is because all the carbohydrates from an unripe banana would have converted into sugars in a ripe banana.
This small activity will highlight the importance of scientific planning of experiments for your students. This will help them recognize the importance of establishing testable hypotheses based on existing knowledge. If one does their background research work well and meticulously plans their experiments, they can avoid unnecessary hurdles that usually stagger lab work. You can also use The Scientific Method simulation and the Experimental Design simulationfrom Labster where similar concepts are explained in detail.

Figure: Iodine molecule entrapment in the amylose (starch) helical structure results in a positive test. Image Source
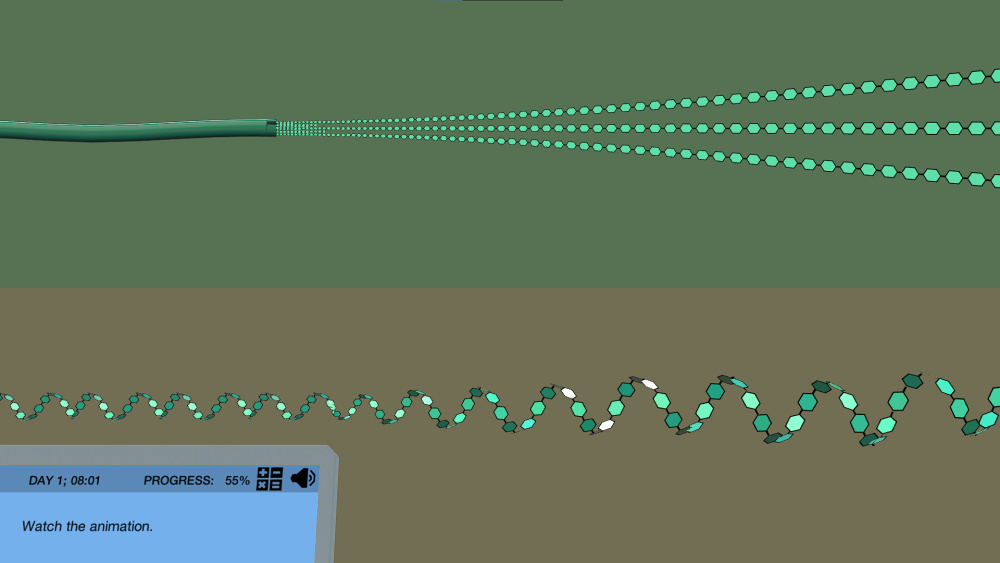
Figure: A snippet from the Iodine Test simulation by Labster showing the helical structure of amylose. It is available for High School classes.
Students are more likely to remember tests and their specific details when they get hands-on experience with lab procedures. We understand that it’s not always possible for educators to conduct individual practice sessions for all the experiments. In such cases, we recommend at least demonstrating the experiment. Since the Iodine test is based on a “chromogenic change (color change; orange/yellow to blue)”, students might find it quite interesting when they observe the color change in front of their eyes.
You can use different food items like table sugar, fruit juice, potato chips, overnight oats, popcorn, milk, french fries, cheese, quinoa, candies, etc which are rich in carbohydrates and sugars to conduct a practical class testing complex carbohydrates’ presence in them. Watch out for your students as the color changes of the Iodine test enthuse them in the class!

Figure: Test results from Iodine test: (-) is the negative result is orangish yellow ;(+) is the positive result is bluish-black.
Educators must simplify the science behind technical experiments. It's crucial to explain why the color in this experiment changes. If you simplify that for your students, half of the job is done! Take leads from the underlisted points and how to simplify them for your students.
Explain which reagent is used in the Iodine test: Lugol’s reagent is used in the Iodine test. This reagent is a common disinfectant and comprises elemental iodine and potassium iodide (KI).
Explain why potassium iodide (KI) is used: Iodine is insoluble in water. Only after the addition of KI, iodine reacts with iodide ions and gives rise to triiodide ions (-3), pentaiodide ions (-5), heptaiodide ions (-7).
Explain why it works for complex carbohydrates: The iodine test works on the principle of “iodine molecule entrapment” in the helical chains of complex carbohydrates. Since starch has amylose which forms a helical chain, the iodine molecules can be trapped inside it. And this gives bluish-black coloration on the Iodine test. Similar results are obtained for dextrin (color: black) and glycogen (color: reddish-brown).
Tell where it doesn’t work: This test fails for sugars (monosaccharides and disaccharides) and branched polysaccharides (like cellulose).
The iodine test is a practical technique used for the detection of complex carbohydrates in food-based research labs, beer brewing companies, and industries. A negative Iodine test result confirms that all the starch has been successfully converted into sugars and the brewing process is complete as expected. Seeing its use worldwide across different fields, clarity and visualization of this technique become important.
We, at Labster, understand the issues faced by both students and teachers. Therefore, we encourage modern-day educators to make the most of the Iodine Test simulation from Labster. It takes your students into a virtual world where they can understand how iodine molecules fit inside the amylose helical structure, how sugars give a negative test while carbohydrates give a positive test, how positive and negative controls are assigned, etc. It also helps your students to actively engage in the experiment using different food items like table sugar, fruit juice, potato chips, overnight oats, popcorn, milk, french fries, cheese, quinoa, candies, etc.
Your students don’t have to struggle anymore as our interactive Iodine Test simulation along with gamification elements will save the day for you. By using this way of active and immersive teaching, our virtual learning platform takes an advent in the field of Science to make the upcoming scientists thorough with the “basics of their respective subjects”.
Figure: A snippet from Iodine Test simulation by Labster showing the iodine reagent. It is available for High School classes.
You can learn more about the Iodine Test simulation here or get in touch to find out how you can start using virtual labs with your students.
Labster helps universities and high schools enhance student success in STEM.
Request DemoRequest a demo to discover how Labster helps high schools and universities enhance student success.
Request Demo.jpg)

.jpg)

