Heading 1
Heading 2
Heading 3
Heading 4
Heading 5
Heading 6
Lorem ipsum dolor sit amet, consectetur adipiscing elit, sed do eiusmod tempor incididunt ut labore et dolore magna aliqua. Ut enim ad minim veniam, quis nostrud exercitation ullamco laboris nisi ut aliquip ex ea commodo consequat. Duis aute irure dolor in reprehenderit in voluptate velit esse cillum dolore eu fugiat nulla pariatur.
Block quote
Ordered list
- Item 1
- Item 2
- Item 3
Unordered list
- Item A
- Item B
- Item C
Bold text
Emphasis
Superscript
Subscript
About This Simulation
Investigate each step of SDS-PAGE from gel selection and sample preparation to chamber assembly and what really happens when the current turns on, to separate proteins solely by molecular weight, bringing us one step closer to identifying the protein.
Learning Objectives
- Assemble the SDS-PAGE apparatus including loading samples and size markers
- Select an appropriate gel and associated electrical settings for resolving the proteins of interest
- Critique the quality of a complete SDS-PAGE run using a removable protein stain
About This Simulation
Lab Techniques
- Gel electrophoresis
- SDS-PAGE
Related Standards
- Early Stage Bachelors Level
- Intermediate Stage Bachelors Level
- Late Stage Bachelors Level
- EHEA First Cycle
- US College Year 1
- US College Year 2
- US College Year 3
- US College Year 4
- Biology Unit 1.3: Introduction to Biological Macromolecules
- Biology 2.4
Learn More About This Simulation
SDS-PAGE creates conditions for separating proteins by an identifying characteristic, molecular weight. In this simulation, you will learn how SDS, the acrylamide gel, buffer solutions, and the electric current work together to separate proteins.
Running an SDS-PAGE
In this lab, students will determine if a particular sized protein is present in their samples. To do this, they must learn about the mechanisms of how SDS-PAGE works including deciding on which gel size to use, how the sample buffer prepares the sample, how to assemble the electrophoresis chamber, and ultimately the interactions between pH, the buffer solutions, and the electric current.
Mechanisms behind SDS-PAGE
In order to determine if the sample contains a protein of a specific molecular weight, students first need to select the right acrylamide gel concentration. This simulation allows them to trial different concentrations to see the effect on protein separation. From here, they prepare the sample through visualizing the effects of each component of the sample buffer on the sample itself. They will then run an SDS-PAGE by assembling the electrophoresis chamber and learning how the current and ions of the buffer solutions interact. With the results of the SDS-PAGE being ready immediately, students will determine which samples contain the target protein.
Gel Review
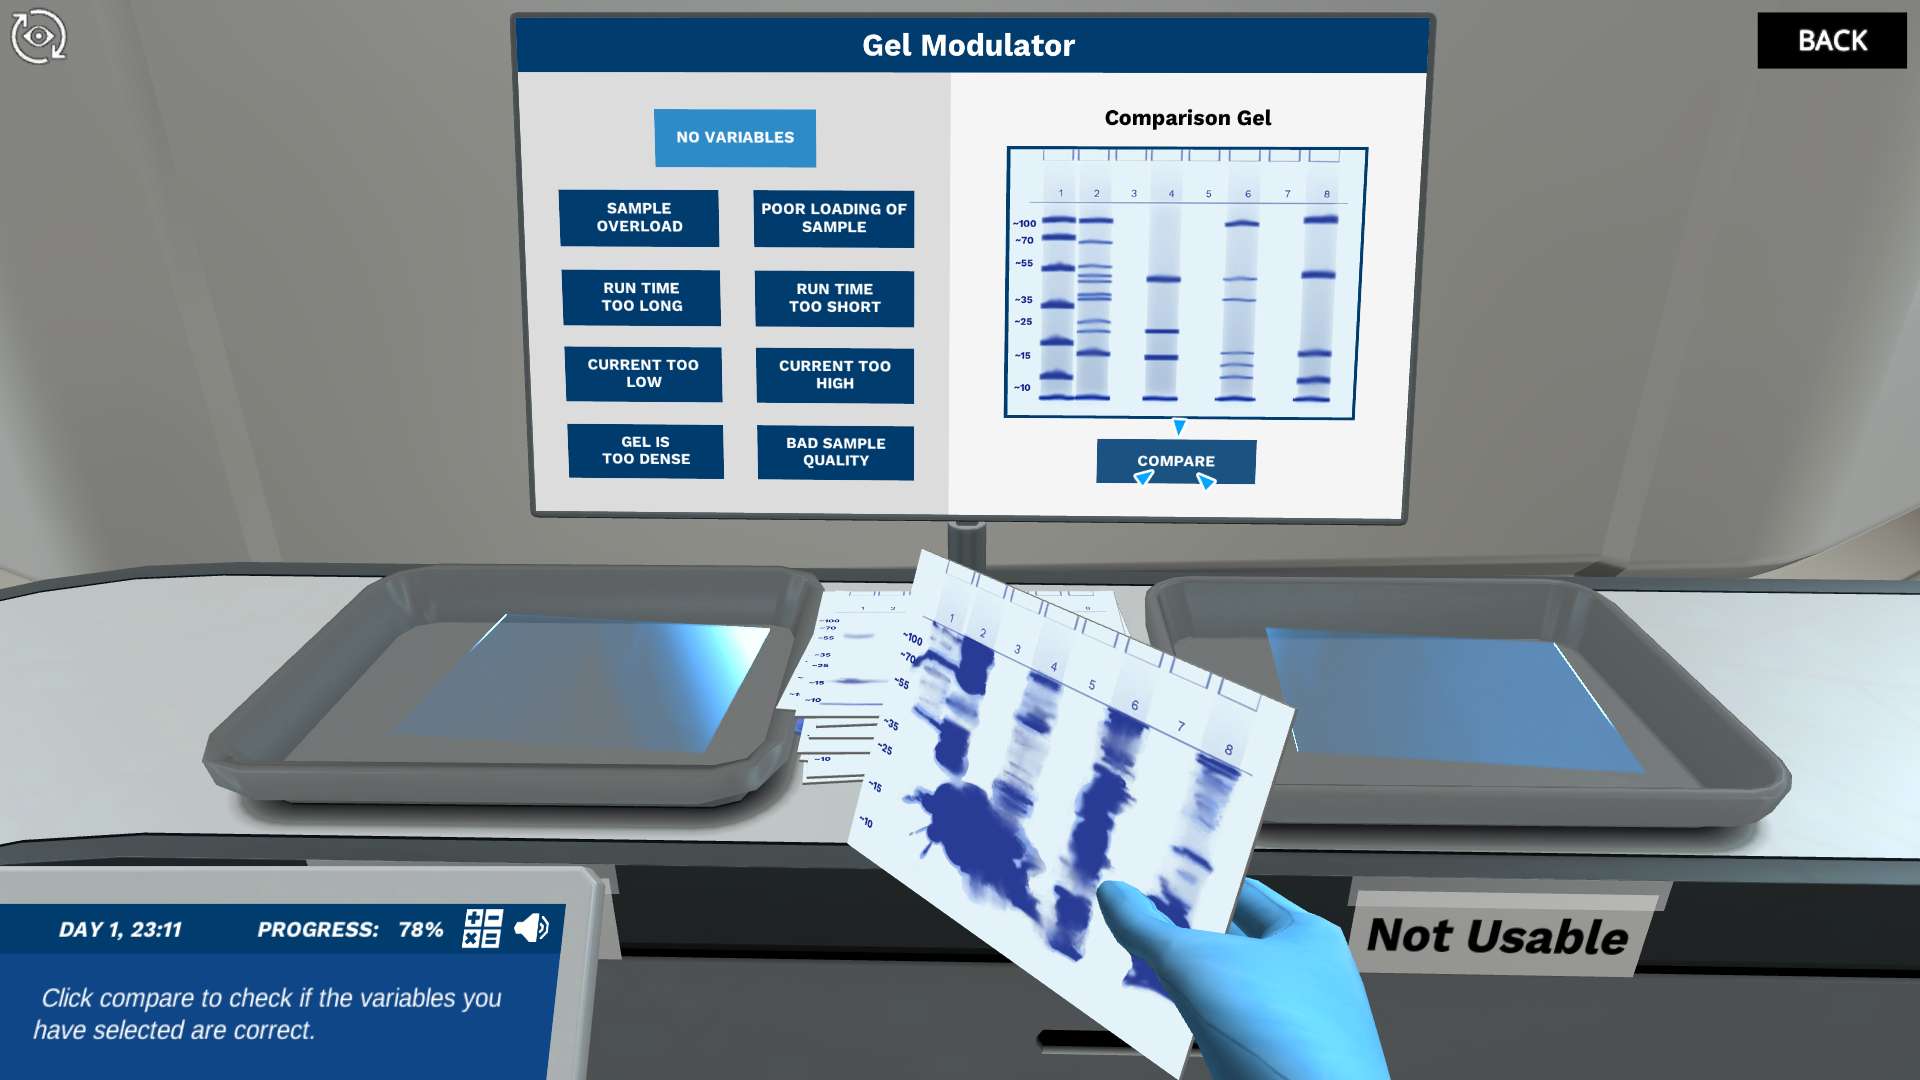
With SDS-PAGE thoroughly explored, students will evaluate their stained gel to identify if the samples have evidence of the target protein. They will also evaluate other gels as usable or unusable and identify reasons that may have caused the outcome.
By understanding SDS-PAGE, will you find the target protein and be able to identify a successful gel?
For Science Programs Providing a Learning Advantage
Boost STEM Pass Rates
Boost Learning with Fun
75% of students show high engagement and improved grades with Labster
Discover Simulations That Match Your Syllabus
Easily bolster your learning objectives with relevant, interactive content
Place Students in the Shoes of Real Scientists
Practice a lab procedure or visualize theory through narrative-driven scenarios


FAQs
Find answers to frequently asked questions.
Heading 1
Heading 2
Heading 3
Heading 4
Heading 5
Heading 6
Lorem ipsum dolor sit amet, consectetur adipiscing elit, sed do eiusmod tempor incididunt ut labore et dolore magna aliqua. Ut enim ad minim veniam, quis nostrud exercitation ullamco laboris nisi ut aliquip ex ea commodo consequat. Duis aute irure dolor in reprehenderit in voluptate velit esse cillum dolore eu fugiat nulla pariatur.
Block quote
Ordered list
- Item 1
- Item 2
- Item 3
Unordered list
- Item A
- Item B
- Item C
Bold text
Emphasis
Superscript
Subscript
A Labster virtual lab is an interactive, multimedia assignment that students access right from their computers. Many Labster virtual labs prepare students for success in college by introducing foundational knowledge using multimedia visualizations that make it easier to understand complex concepts. Other Labster virtual labs prepare learners for careers in STEM labs by giving them realistic practice on lab techniques and procedures.
Labster’s virtual lab simulations are created by scientists and designed to maximize engagement and interactivity. Unlike watching a video or reading a textbook, Labster virtual labs are interactive. To make progress, students must think critically and solve a real-world problem. We believe that learning by doing makes STEM stick.
Yes, Labster is compatible with all major LMS (Learning Management Systems) including Blackboard, Canvas, D2L, Moodle, and many others. Students can access Labster like any other assignment. If your institution does not choose an LMS integration, students will log into Labster’s Course Manager once they have an account created. Your institution will decide which is the best access method.
Labster is available for purchase by instructors, faculty, and administrators at education institutions. Purchasing our starter package, Labster Explorer, can be done using a credit card if you are located in the USA, Canada, or Mexico. If you are outside of North America or are choosing a higher plan, please speak with a Labster sales representative. Compare plans.
Labster supports a wide range of STEM courses at the high school, college, and university level across fields in biology, chemistry, physics, and health sciences. You can identify topics for your courses by searching our Content Catalog.


